

Water behaves as an unyielding, destructive force inside any residential structure. While catastrophic events like flash floods or severed fire-suppression mains dominate common perceptions of property damage, the vast majority of residential moisture crises stem from subtle, cumulative intrusion. Water exploits microscopic thermal stress fractures in exterior masonry, capillary action along framing studs, deteriorated elastomeric sealants, and undetected condensation pooling behind gypsum wallboard. When left unmitigated, persistent dampness degrades the load-bearing capacity of dimensional framing lumber, induces dry rot fungi, corrodes mechanical fasteners, and ruins interior floor finishes.
Protecting a residential structure requires a comprehensive, dual-track moisture management strategy. Homeowners must pair robust exterior building-envelope maintenance with disciplined interior plumbing protocols. When these defensive perimeters fail during extreme weather or unexpected mechanical breakdown, recovery hinges on swift water extraction, calculated dehumidification, and certified environmental remediation. Understanding how liquid and vapor move through building assemblies enables property owners to identify vulnerability markers, implement preventative reinforcements, and safeguard structural longevity and indoor air safety.
Inspect Valleys and Penetration Flashing After Severe Weather
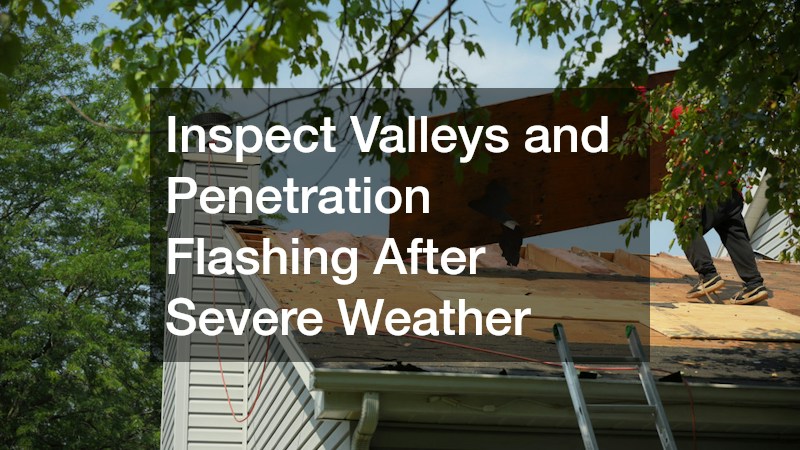
Roof penetrations represent the single most common failure point on residential structures. Plumbing vents, chimneys, dormer intersections, and skylights require specialized sheet metal flashing to deflect water running down sloped surfaces. Over years of thermal cycling, sealants dry out, metal corrodes, and mechanical fasteners back out of rafters, opening direct paths into the framing below.
- Examine step flashing along vertical chimney walls and dormers to confirm that kick-out flashing diverts water directly into the drainage channel rather than behind exterior siding.
- Check neoprene and rubber vent boots around soil plumbing pipes for ozone cracking, weathering splits, or torn base collars.
- Inspect open roof valleys for debris accumulation, rust pits on exposed metal, or cracked shingles along cut lines that create natural water dams.
- Conduct semi-annual inspections inside the attic during heavy rains to look for darkened plywood sheathing, rusted shingle nails protruding through decking, or damp fiberglass insulation batts.
When inspections reveal widespread flashing corrosion, detached valley linings, or localized sub-sheathing rot that cannot be resolved safely with surface sealants, homeowners should contact professional roofing contractors. Certified professionals possess the safety harnesses, fall-arrest gear, and diagnostic tools to evaluate steep-slope decking without causing shingle scuffing or personal injury.
Evaluate Decking Deflection and Granular Attrition
Asphalt shingles undergo steady mechanical wear from atmospheric exposure. Shingles lose protective mineral granules over time, stripping away the reflective barrier that keeps the petroleum asphalt substrate flexible and water-resistant.
- Monitor gutter downspout discharge zones for heavy accumulations of asphalt granules, which signal that shingles are entering the terminal phase of their operational lifespan.
- Look for cupping, curling shingle edges, and brittle tabs that lift easily during moderate wind gusts, allowing wind-driven rain to enter underneath the field.
- Walk the attic interior and probe suspect roof decking for deflection, soft spots, and spongy plywood caused by slow leaks that wick into wood fibers.
- Ensure roof valleys and low-pitch sections are protected by self-adhering, rubberized asphalt underlayment that seals around nail shanks.
When more than one-third of the roofing field displays tab loss, curled edges, or soft spots in decking, patching individual leaks becomes inefficient. Investing in a complete roof replacement establishes a renewed, continuous barrier across the entire building envelope, complete with synthetic underlayments, eaves ice shields, and balanced ridge ventilation that vents trapped attic humidity.
Divert Downspout Discharges Beyond the Backfill Zone
A standard residential roof collects thousands of gallons of water during a single heavy rainstorm. When drainage fixtures fail or overflow, this deluge dumps directly alongside foundation footings, eroding perimeter soil and pooling against concrete block walls.
- Install a heavy-gauge aluminum or copper seamless gutter system around the roof perimeter to eliminate the seam leaks and sagging joints typical of sectional pieces.
- Maintain a consistent gutter slope of at least one-quarter inch per ten feet toward each downspout drop outlet to keep water moving rapidly toward drain points.
- Attach rigid downspout extensions that carry roof discharge at least ten feet away from foundation walls to prevent hydraulic saturation of backfill soil.
- Connect downspouts to underground smooth-interior PVC piping leading to daylight discharge points, catch basins, or pop-up release emitters located well downhill.
- Clear out organic pine needles, leaf litter, and rooftop sediment twice annually to prevent water dams from backing up underneath the lower eave flashing.
Relieve Hydrostatic Slab Pressure with Sub-Surface Drainage

Subterranean concrete walls and floating slabs are naturally porous. As soil absorbs surface runoff, rising water tables create lateral hydrostatic pressure that forces liquid through cold joints and settling cracks.
- Grade finished soil surfaces away from the foundation perimeter at a minimum downward slope of six inches across the first ten feet of horizontal clearance.
- Inspect unfinished basement and crawlspace surfaces for white powdery mineral efflorescence, stair-step masonry cracks, and capillary dampness rising from slab footings.
- Implement comprehensive basement waterproofing solutions, such as interior perforated drain tiles embedded in washed stone trenches along the footing trench.
- Seal interior masonry block walls with heavy dimpled composite drainage membranes that capture wall seepage and guide it downward into sub-slab channels.
- Equip interior sump basins with dual-pump configurations featuring a primary submersible pump, a secondary backup unit, and a high-capacity deep-cycle battery power supply.
Clear Evaporator Trap Assemblies and Primary Drain Lines
The indoor evaporator coil relies on gravity-fed drainage lines to channel chilled water runoff outdoors or toward a plumbing drain. Algae, airborne dust, fungal slime, and lint collect in these wet channels, forming gelatinous plugs that back up into living spaces.
- Flush primary condensate lines monthly during the summer cooling season with warm water and distilled white vinegar to dissolve algae and sediment buildup.
- Clear exterior drain termination lines using a wet-dry utility vacuum to dislodge compacted sludge, insect nests, and mineral crusts.
- Install an auxiliary drain pan under horizontal attic air handlers, fitted with an automated inline float safety switch that cuts system power when standing water appears.
- Schedule immediate air conditioner repair if you detect ice accumulation on external refrigerant tubing, rust flakes pooling in the secondary pan, or water pooling near the blower cabinet.
- Inspect the condensate trap for proper venting and prime it with clean water at the beginning of the warm season to prevent dry suction locks.
Regulate Indoor Humidity and Reseal Ductwork Penetrations
In humid climates, air conditioning ducts running through unconditioned crawlspaces or attics condense moisture along their exterior jackets whenever chilled air cools uninsulated sheet metal below the ambient dew point.
- Keep indoor relative humidity levels between thirty and fifty percent using whole-house dehumidifiers or variable-speed blower fans to prevent surface condensation.
- Seal sheet metal duct joints and plenum seams using fiber-reinforced mastic paste and foil tape rather than cloth duct tape, which deteriorates quickly under heat.
- Insulate chilled distribution ducts with foil-faced fiberglass wrap to keep exterior surface temperatures above the local dew point.
- Partner with reputable HVAC companies to execute comprehensive seasonal tune-ups, balance airflow across dampers, calibrate thermostats, and verify refrigerant charge.
Clear Lateral Waste Lines and Install Backwater Flappers
Main sewer laterals collect household graywater and blackwater, carrying discharge toward municipal treatment collectors or private septic fields. Over years of operation, waste pipes narrow from grease solidification, hair agglomeration, and tree root intrusion.
- Watch for telltale warning signs of sewer lateral blockages, such as bubbling lower-level toilet bowls, slow drains across multiple fixtures, or sewer gas odors emerging from floor traps.
- Avoid relying on corrosive chemical liquid drain openers, which damage vintage cast iron pipes, melt PVC joints, and fail to remove heavy mechanical obstructions.
- Engage licensed drain cleaning services to clear stubborn blockages through hydro-jetting, rooter augering, and closed-circuit inline camera evaluations.
- Have technicians inspect sewer lines for pipe sags, misaligned joints, bellies, and invasive tree roots that create repeated waste backups.
- Install a mechanical backwater check valve on the primary building drain to prevent city storm surges from backing sewage into basement fixtures during heavy rainstorms.
Upgrade Pressurized Supply Lines to Braided Steel

Pressurized domestic water lines operate under constant dynamic pressure between forty and seventy pounds per square inch. When weak flexible supply lines or aging valves fail, water pours into walls and ceilings at rates exceeding ten gallons per minute.
- Replace brittle polymer or unreinforced rubber hoses on washing machines, dishwashers, and ice makers with braided stainless steel supply lines.
- Install dedicated quarter-turn brass ball valves at every fixture cutoff point to ensure instant, dependable manual isolation during plumbing emergencies.
- Cycle fixture shut-off valves and the main house shut-off valve twice each year to remove mineral scale deposits and prevent mechanical seizing.
- Mount automated leak detection systems with inline ultrasonic flow meters and wireless perimeter sensors that immediately shut off water supply during abnormal flow spikes.
Isolate Inflow Sources and Cut Electrical Circuits
The initial sixty minutes following a major water intrusion require decisive triage to safeguard occupants and stop additional inflow.
- Locate and shut off the home’s main water gate valve or quarter-turn ball valve immediately upon discovering active indoor flooding.
- De-energize electrical breakers serving wet living areas from the main service panel to prevent electrocution hazards before stepping into standing water.
- Classify the contamination category of the intruding water: Category 1 clean water from supply pipes, Category 2 graywater from appliances, or Category 3 blackwater from sewage backups or overland floodwaters.
- Evacuate delicate furnishings, Persian rugs, electronics, and paperwork to dry elevated zones, placing foil squares or plastic shims under remaining furniture legs to halt stain transfer.
- Photograph all damaged building elements, personal belongings, and standing water heights thoroughly before touching or disposing of any components to support insurance claims.
Deploy Commercial Air Movers and Industrial Dehumidifiers
Surface wiping and casual open-window ventilation cannot overcome deep interstitial dampness. Structural elements like oriented strand board, hardwood strip flooring, and ceiling joists hold bound water within their cellular matrix that requires engineered psychrometric evaporation.
- Extract standing surface water using industrial-grade submersible trash pumps and high-lift wet extraction vacuums rather than conventional residential cleaning equipment.
- Contract professional teams specializing in structured water damage restorations to establish targeted containment barriers and run penetrating pin-type moisture meters across wall surfaces.
- Position high-velocity axial air movers diagonally along perimeter baseboards to shear the boundary layer of damp air off building materials and accelerate evaporative drying.
- Run commercial low-grain refrigerant or desiccant dehumidifiers continuously to lower the ambient air’s specific humidity, pulling trapped moisture out of wall studs.
- Remove saturated drywall, baseboards, and fibrous insulation at least twelve to twenty-four inches above the highest detected water line to expose framing for complete drying.
Sample Air Quality When Persistent Odors Linger
Fungal colonization often hides behind wallpaper, under glued vinyl flooring, or inside finished basement wall cavities, making visual identification difficult until contamination becomes severe.
- Take note of sensory warning signs, including earthy odors, unexplained respiratory irritation among occupants, or discolored bubbling along baseboards and painted surfaces.
- Retain an independent, third-party mold testing service to conduct baseline non-viable spore-trap air sampling and inner-wall cavity air testing before scheduling demolition work.
- Utilize accredited environmental testing laboratories to analyze bio-aerosol cassettes, identifying specific fungal genera such as Aspergillus, Penicillium, Cladosporium, and Stachybotrys.
- Compare indoor spore concentrations and particulate distributions against outdoor baseline control samples collected on the same day to verify active indoor amplification.
- Avoid using self-administered hardware store petri dish test kits, which routinely yield false positives because ambient air naturally contains viable outdoor spores.
Contain Contaminated Drywall and Treat Framing Lumber

Scrubbing living mold colonies with household bleach provides a false sense of security. Chlorine bleach evaporates quickly on porous substrates, leaving residual moisture that hydrates deep mycelia within framing.
- Hire an IICRC-certified mold restoration company to erect polyethylene containment enclosures fitted with continuous HEPA-filtered negative air machines before disturbing infested building materials.
- Bag mold-damaged drywall, acoustic ceiling panels, and tackless carpet strips in sealed six-mil bags inside the containment boundary to prevent spore dispersion into clean zones.
- Scrub exposed structural framing lumber and subfloor substrates using abrasive mechanical agitation, wire brushing, or dry-ice blasting paired with continuous HEPA vacuuming.
- Treat cleaned framing lumber with EPA-registered institutional antimicrobial biocides and apply breathable encapsulating polymer sealants to prevent fungal re-colonization.
- Require independent clearance post-remediation testing to confirm that particle levels and spore counts match or fall below clean outdoor baseline thresholds before rebuilding.
Moisture management is an ongoing responsibility that dictates a home’s structural lifespan. Water readily finds microscopic pathways through exterior building materials, migrating silently along framing members and causing severe hidden damage before appearing inside finished spaces. The compounding costs of wood rot, insulation replacement, and structural rebuilding rapidly eclipse the modest investment required for preventative maintenance.
A durable moisture defense begins outside. Keeping roof drainage assemblies clear, routing downspouts past foundation backfill, sealing exterior penetrations, and maintaining negative soil grading provide the primary defense against storm events. Inside the home, vigilant mechanical upkeep, regular plumbing inspections, and responsive sensor technology stop leaks before they spread. When unexpected weather, mechanical failure, or broken plumbing breaches your home’s defenses, swift action prevents catastrophic loss. By addressing warning signs early, investing in seasonal exterior maintenance, and engaging qualified professionals at the first indication of intrusion, homeowners can protect their investment, preserve indoor air, and ensure structural resilience.